
In general, if you want to make sure your PC is safe, you should always have security turned on. This could be done by using Windows Defender, which is built into Windows 10 by Microsoft, or by using a security tool from a company other than Microsoft.
1. How to use Windows Settings to turn off Windows Defender
Follow these steps to turn Windows Defender on or off using Windows Settings:
- Open Windows Settings (Windows key + i)
- Go to Update & Security –> Windows Security
- From the right-hand pane, select Manage settings under Virus & threat protection settings.
- Toggle the switch to Off under Real-time protection.
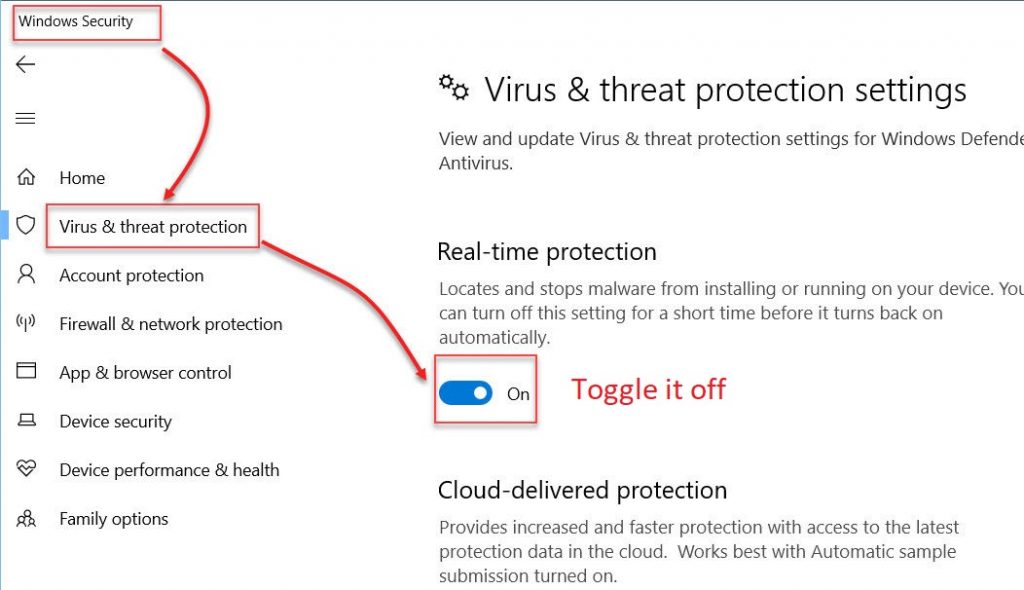
When you do this, automatic protection will be off, but you may still run a scan manually.
2. Turn off Windows Defender quickly with Defender Control
See details and download Defender Control here
3. How To Permanently Turn Off Windows Defender Using Group Policy
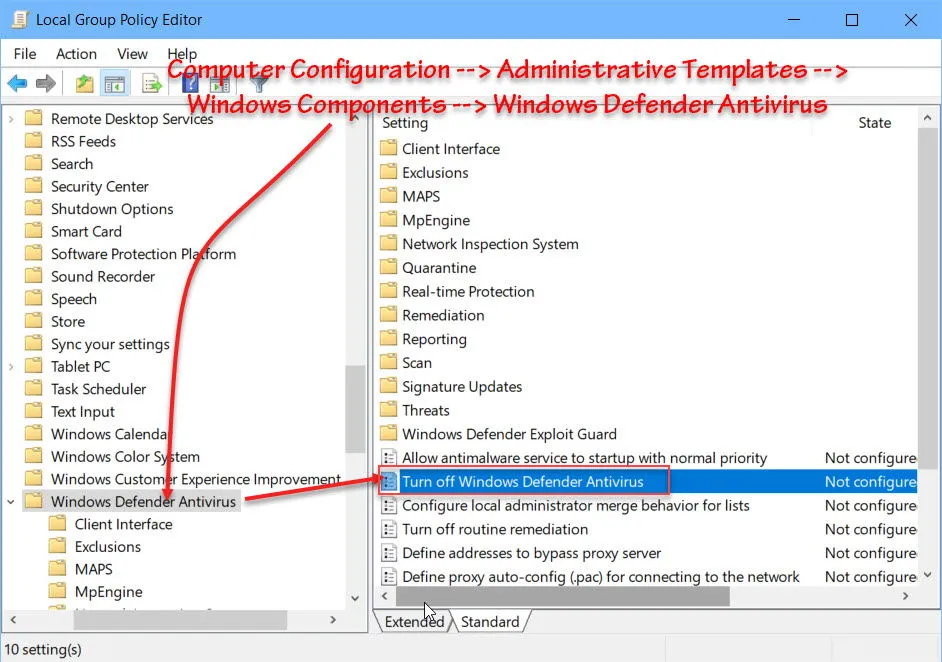
If you are in charge of a network and want to get rid of Windows Defender from it, you should use Group Policy. Just follow the steps below to use the Group Policy editor to turn off Windows Defender:
- Open Group Policy Editor (Run –> gpedit.msc)
- Go to Computer Configuration –> Administrative Templates –> Windows Components –> Windows Defender Antivirus
3. Open Turn off Windows Defender Antivirus from the right-hand pane and choose Enabled.
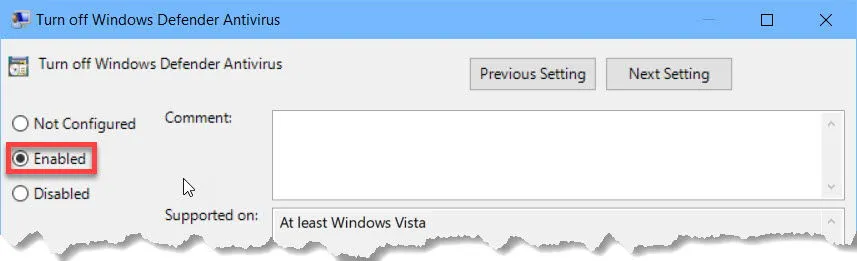
Both Local Group Policy and Domain Group Policy can be used to change this setting. Windows Defender will be turned off for all local users by the local policy, while it will be turned off for all systems where the domain policy is applied by the domain policy.
See details and download Defender Control here
3. How To Permanently Turn Off Windows Defender Using Group Policy
If you are in charge of a network and want to get rid of Windows Defender from it, you should use Group Policy. Just follow the steps below to use the Group Policy editor to turn off Windows Defender:
- Open Group Policy Editor (Run –> gpedit.msc)
- Go to Computer Configuration –> Administrative Templates –> Windows Components –> Windows Defender Antivirus
3. Open Turn off Windows Defender Antivirus from the right-hand pane and choose Enabled.
Both Local Group Policy and Domain Group Policy can be used to change this setting. Windows Defender will be turned off for all local users by the local policy, while it will be turned off for all systems where the domain policy is applied by the domain policy.