
Autocad is a computer-aided design (cad) program used by just about every engineering and design office in the world. Although there are alternative cad packages, Autocad is by far the most widely used system. Autodesk’s AutoCAD is the industry leader in cad packages. used by civil engineers, architects, mechanical and electrical engineers, aeronautical engineers plus many other disciplines.
Autocad is a paid software, so to use it you have to spend money to buy. But don’t worry, there are much easier ways for you to use the full functionality of AutoCAD without limits. In this article, we will show you how to enable Autocad for versions from 2015 to 2019 without spending a penny.
How to activate AutoCAD 2015 to 2019 for Mac
This tutorial works on macOS Mojave version 10.14.2 and AutoCAD 2019 (versions from AutoCAD 2015 and above do the same).
Step 1: Download the AutoCAD version you need
-
- Autocad 2015 for mac
- Autocad 2016 for mac
- Autocad 2017 for mac
- Autocad 2018 for mac
- Autocad 2019 for mac
Step 2: Extract and run the file: ‘Autodesk_AutoCAD_201x_Mac_OSX.dmg’ run the Autodesk AutoCAD 2019 for Mac.pkg Install Autodesk OSX 2015 Products (standalone).
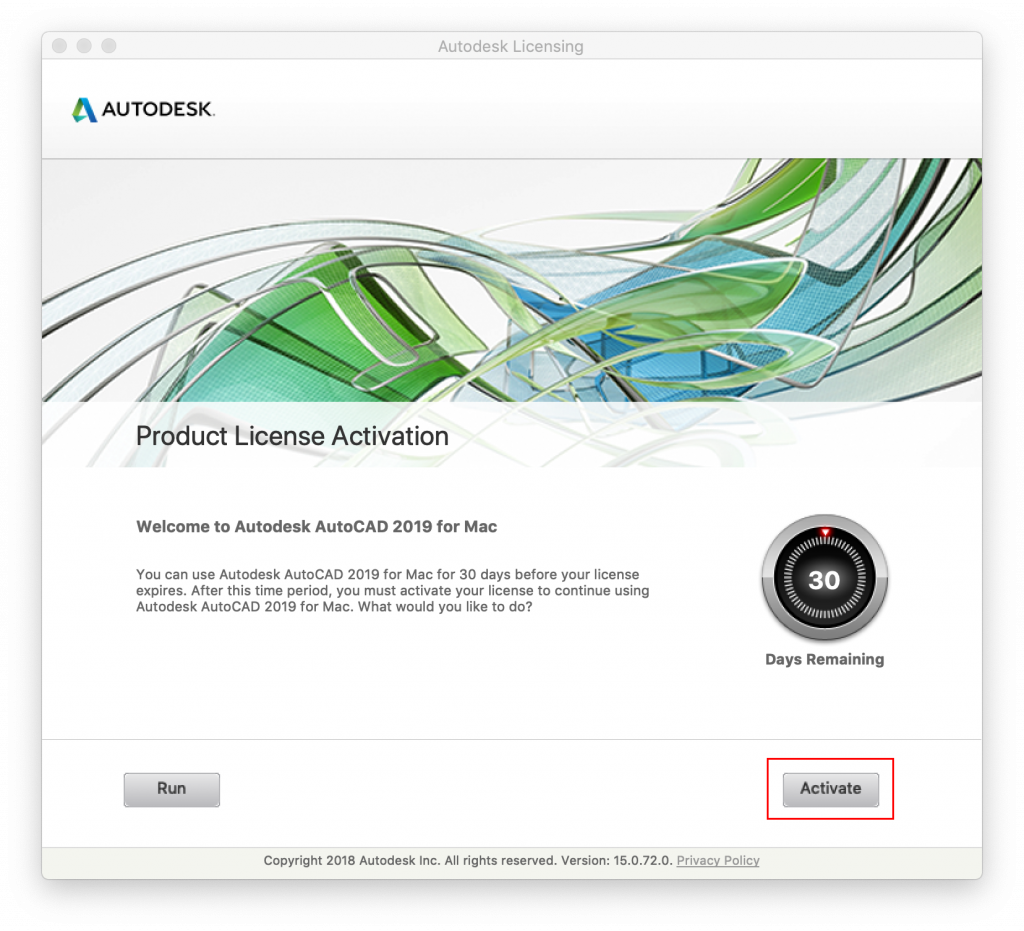
Step 3: Finish the installation & restart Autocad, on the first run, choose to ‘Enter a Serial Number’
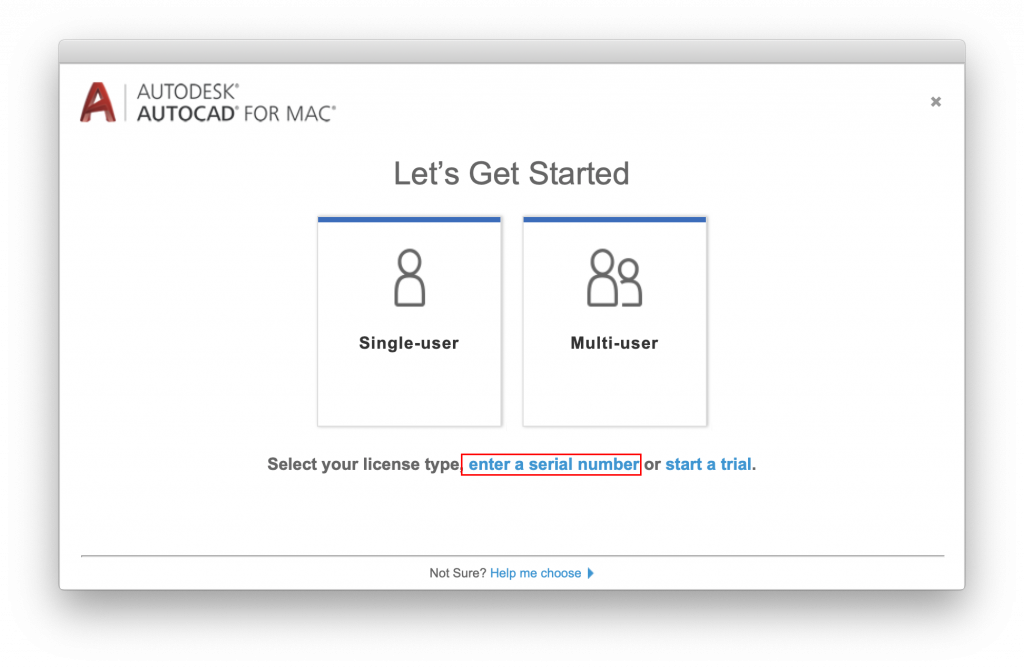
Click on ‘Active’
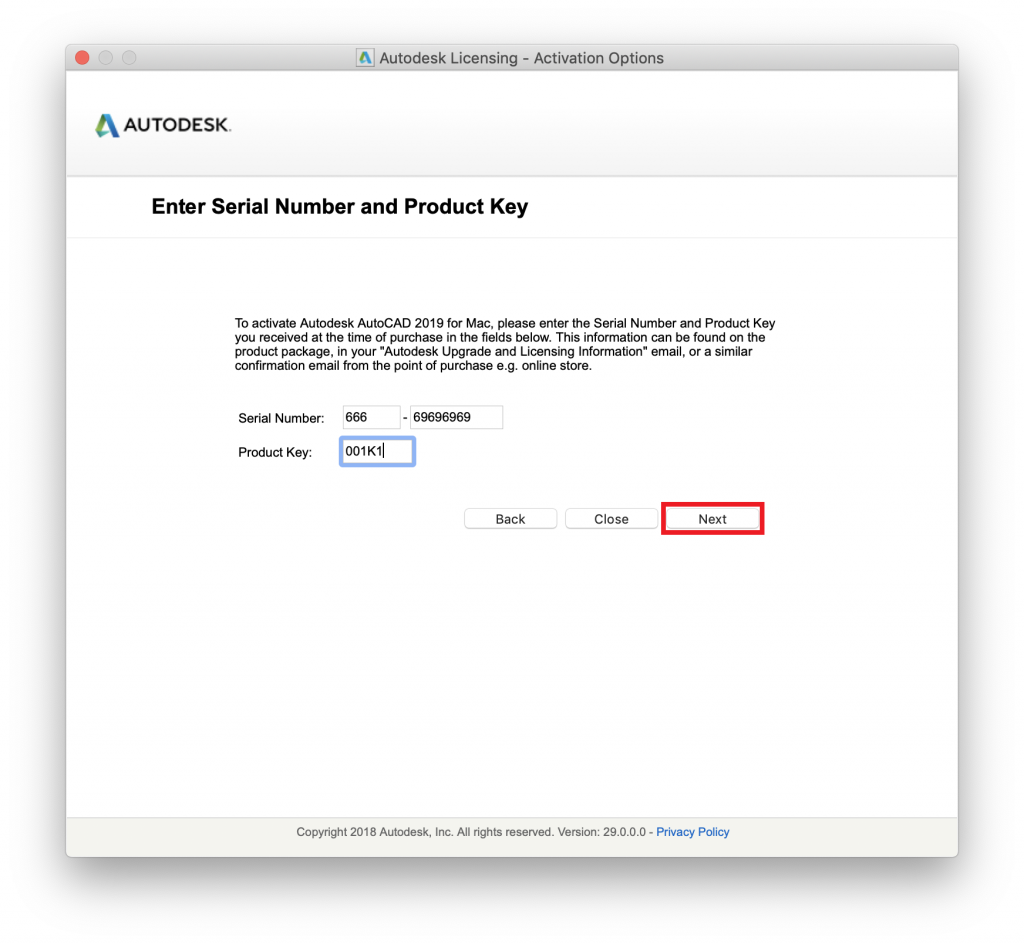
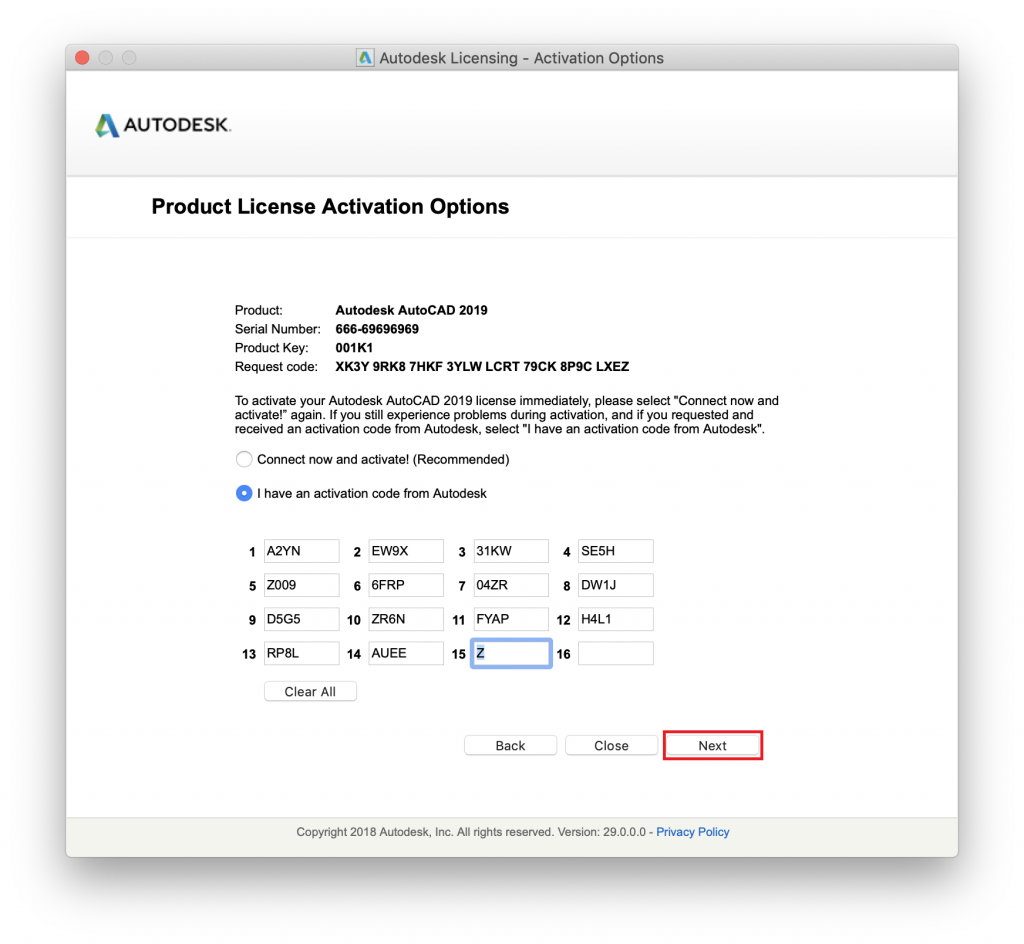
Step 4: First, disconnect the internet, then Enter the Serial information as follows -> click on the ‘Next’ button
Serial: 666-69696969 or 667-98989898, 400-45454545, 066-66666666
Product Key: 001K1 or ( Autocad 2015: 777G1, Autocad 2016: 777H1, Autocad 2017: 777I1, Autocad 2018: 001J1, Autocad 2019: 001K1 )
You will see the screen error message as follows:
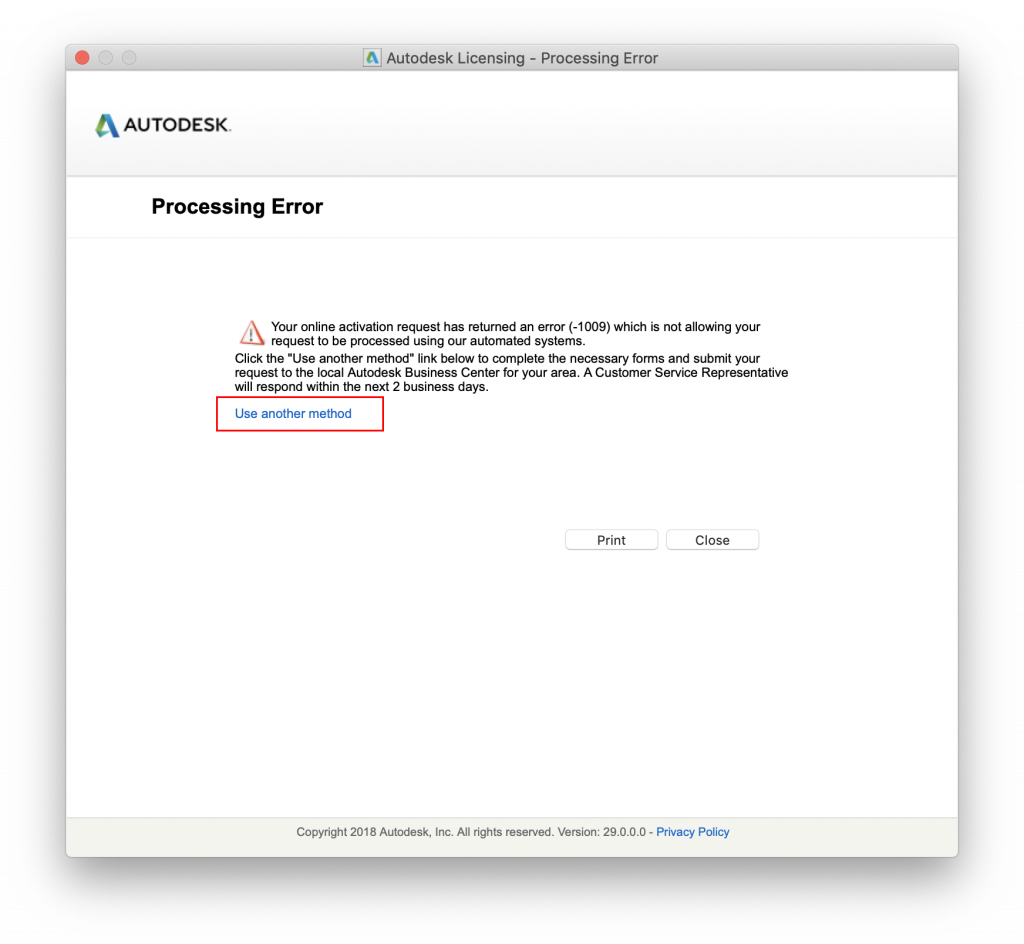
Step 6: Select ‘Use another method’. You will now have 2 active options (image below)
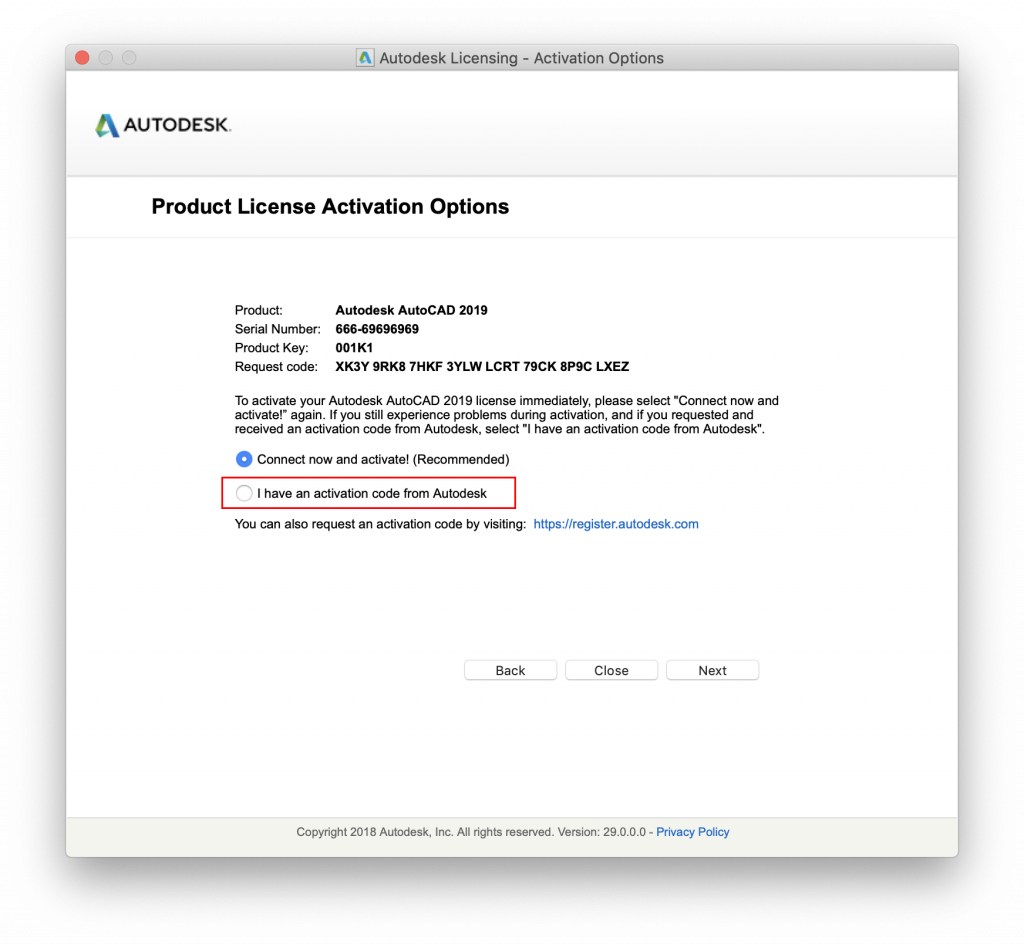
Select ‘I have an activation code from Autodesk’ -> Then click ‘Next’. You will see the screen to enter the Activation Code
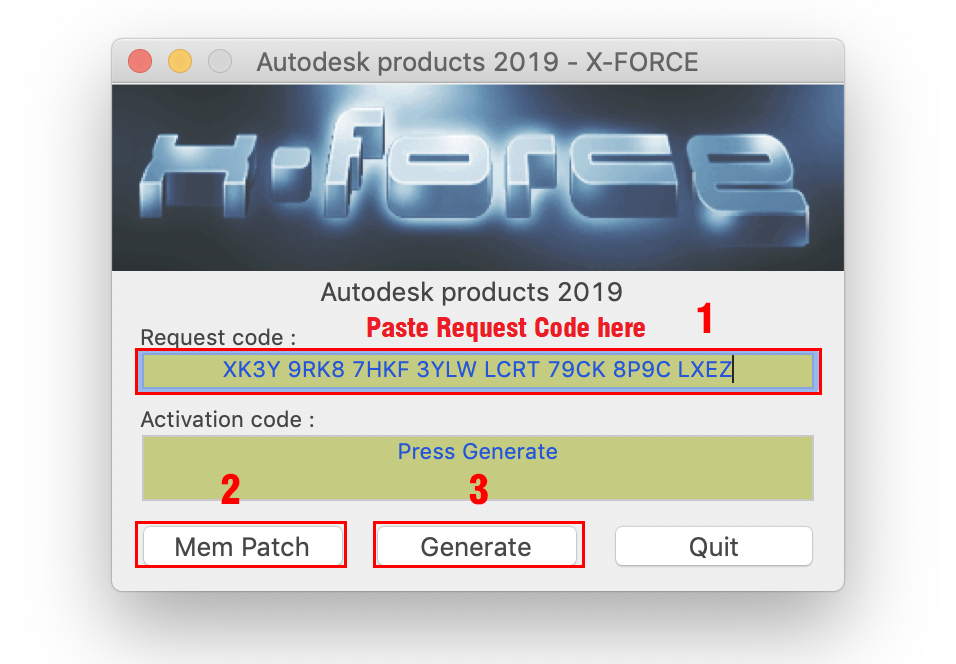
Step 7: Important! Please order the steps as follows
- Reopen the downloaded folder in step 2 then go to the Crack folder, run the file ‘xf-adesk19.dmg’
- Copy Request Code in Step 6 and paste it into X-FORCE Request Code box
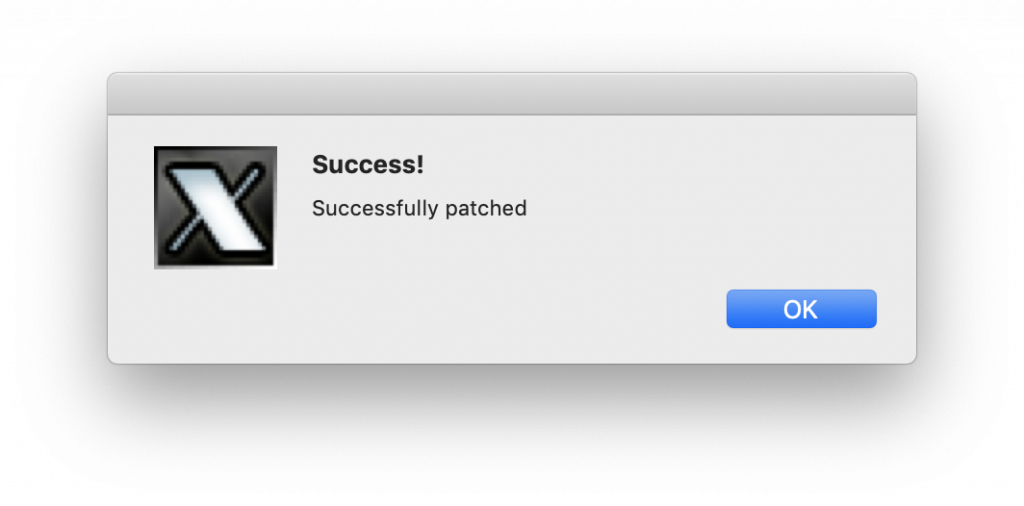
- Click on Mem Patch (you should see successfully patched) and then click Generate
After clicking Generate. You will have the Activation Code
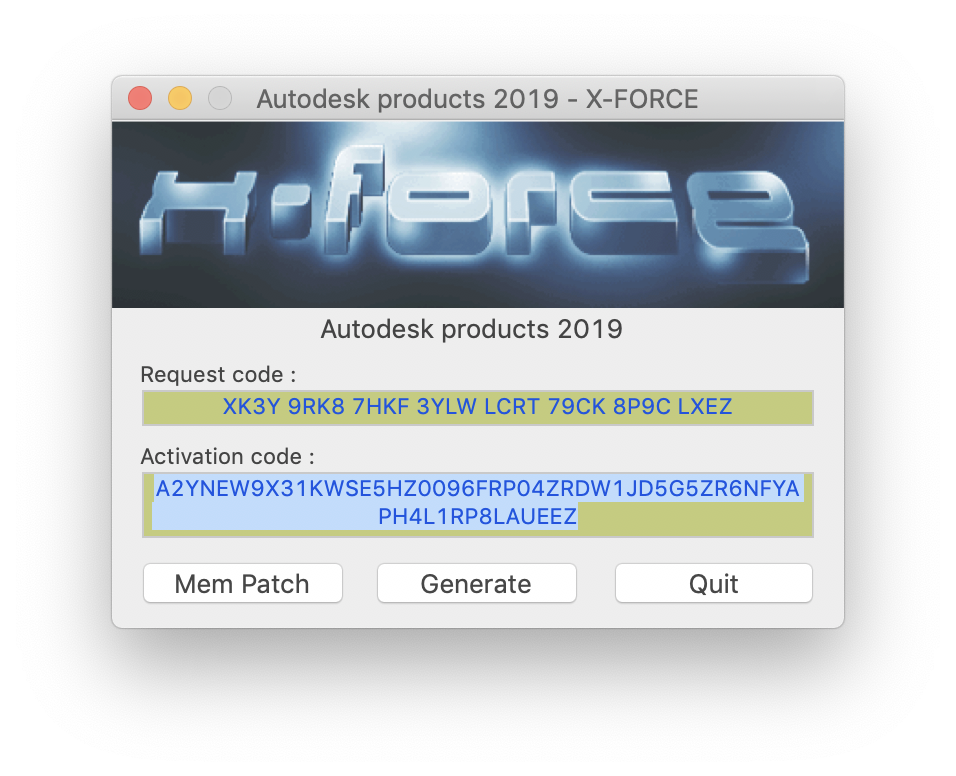
4. Now copy the activation code back to the activation screen (on Step 6) and click Next
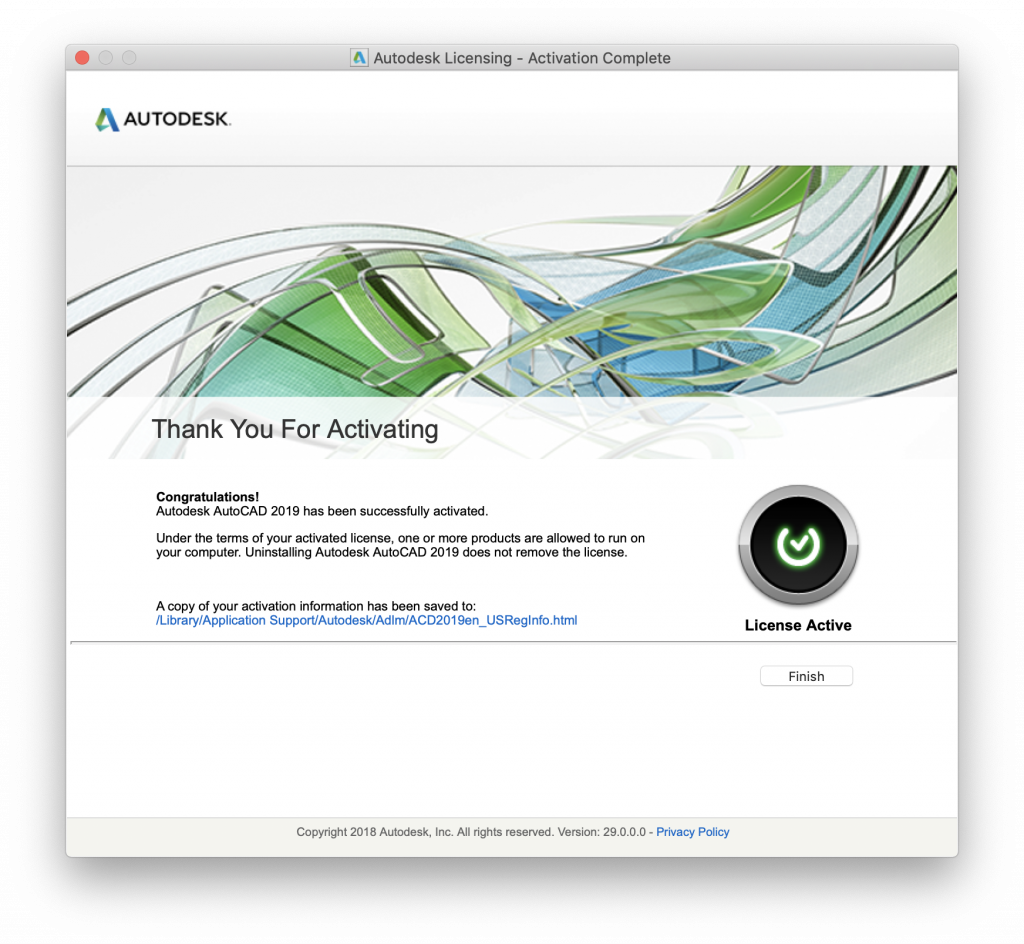
Done! You have a fully registered Autodesk product.
Note: Step 7 is an important step, most of you failed because of the wrong order in this step. You should be careful at this step